Ready-to-use AI Apps
Easily manage evaluation processes and produce documents in different formats.
Agent Management
In this article, you will learn how to manage agents on our platform. Agent management includes creating new agents, updating their settings, deleting agents, and interacting with them through chat. Below are the steps necessary to perform these actions.
How to Add a New Agent
To add a new agent, you first need to access the "Agents" section from the navigation menu. Once inside, you will see a button that says "Create an Agent". Clicking this button will open a pop-up where you can enter all the necessary information to configure your new agent.
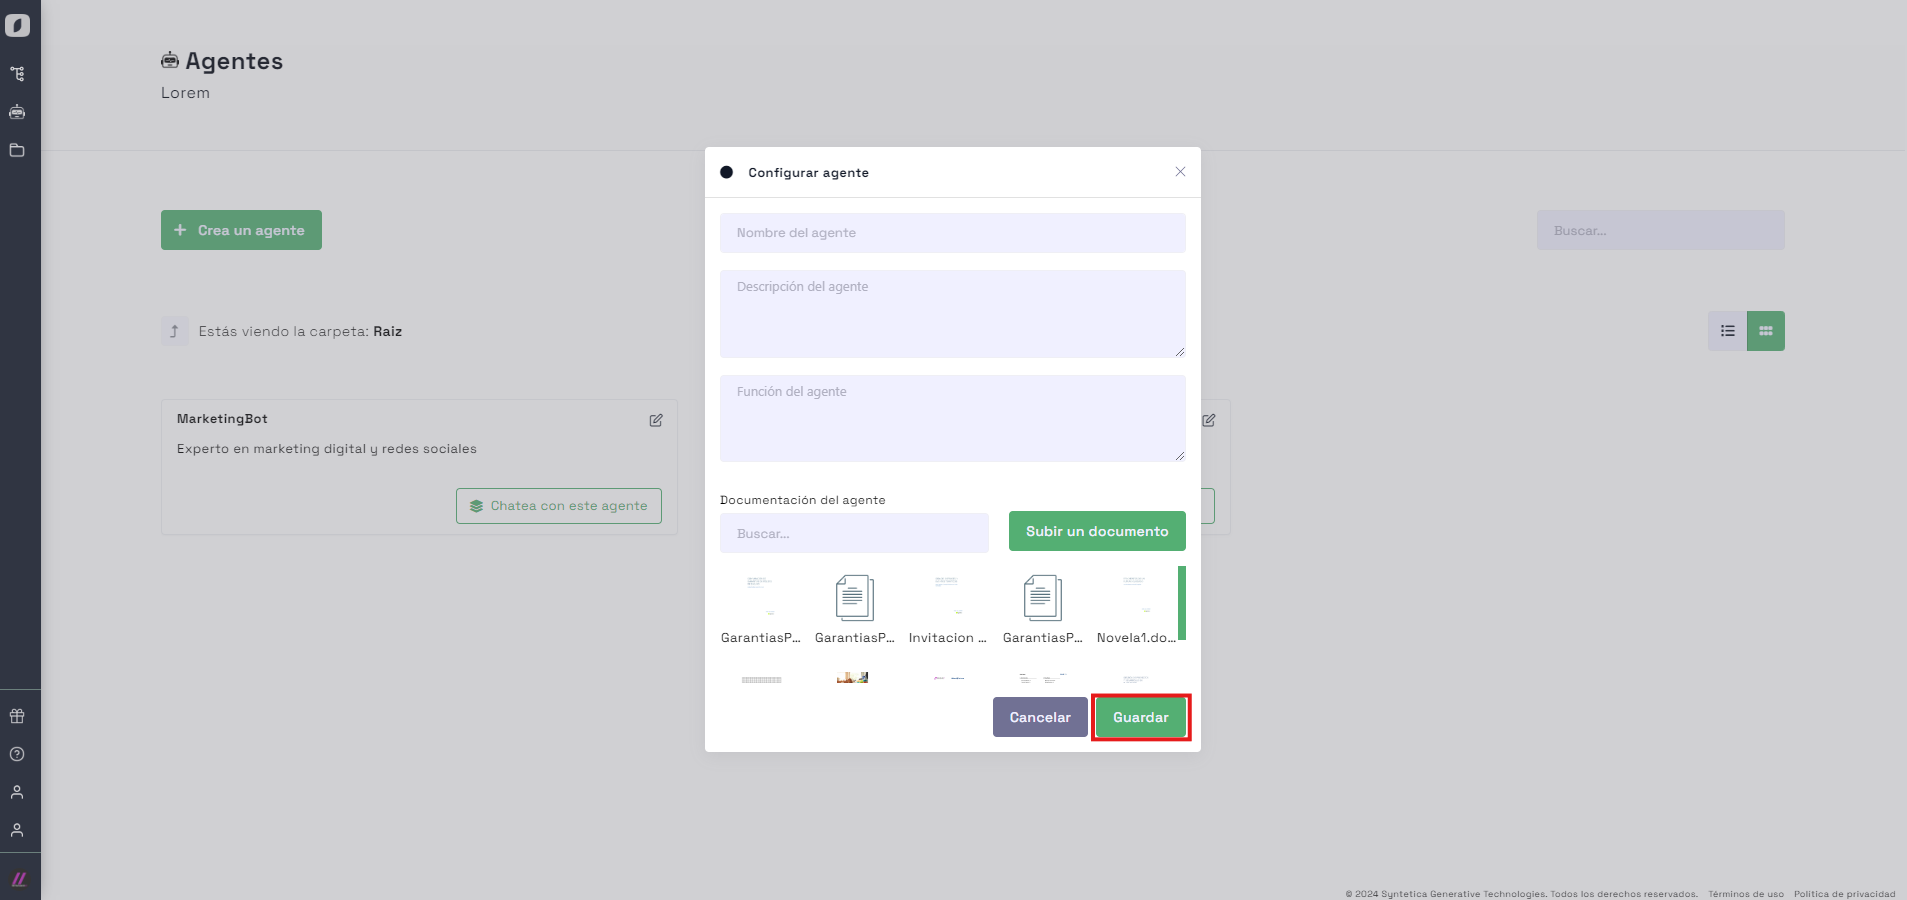 Form to add a new agent, with fields to enter relevant information.
In this form, you will need to provide details such as the agent's name, a description, and any files or documents you wish to associate with it. Additionally, you must configure an agent function that will serve as a prompt in the chat. Once you have completed all the fields, make sure to click "Save" to finalize the creation of the agent. This agent will now be available in the list of agents, and you can interact with it as needed.
Note: It is important to provide a clear and precise description for each agent, as this will help you identify its purpose and functionality in the future.
How to Update an Agent's Settings
Updating an agent's settings is a simple process. First, select the agent you want to modify from the list of available agents.
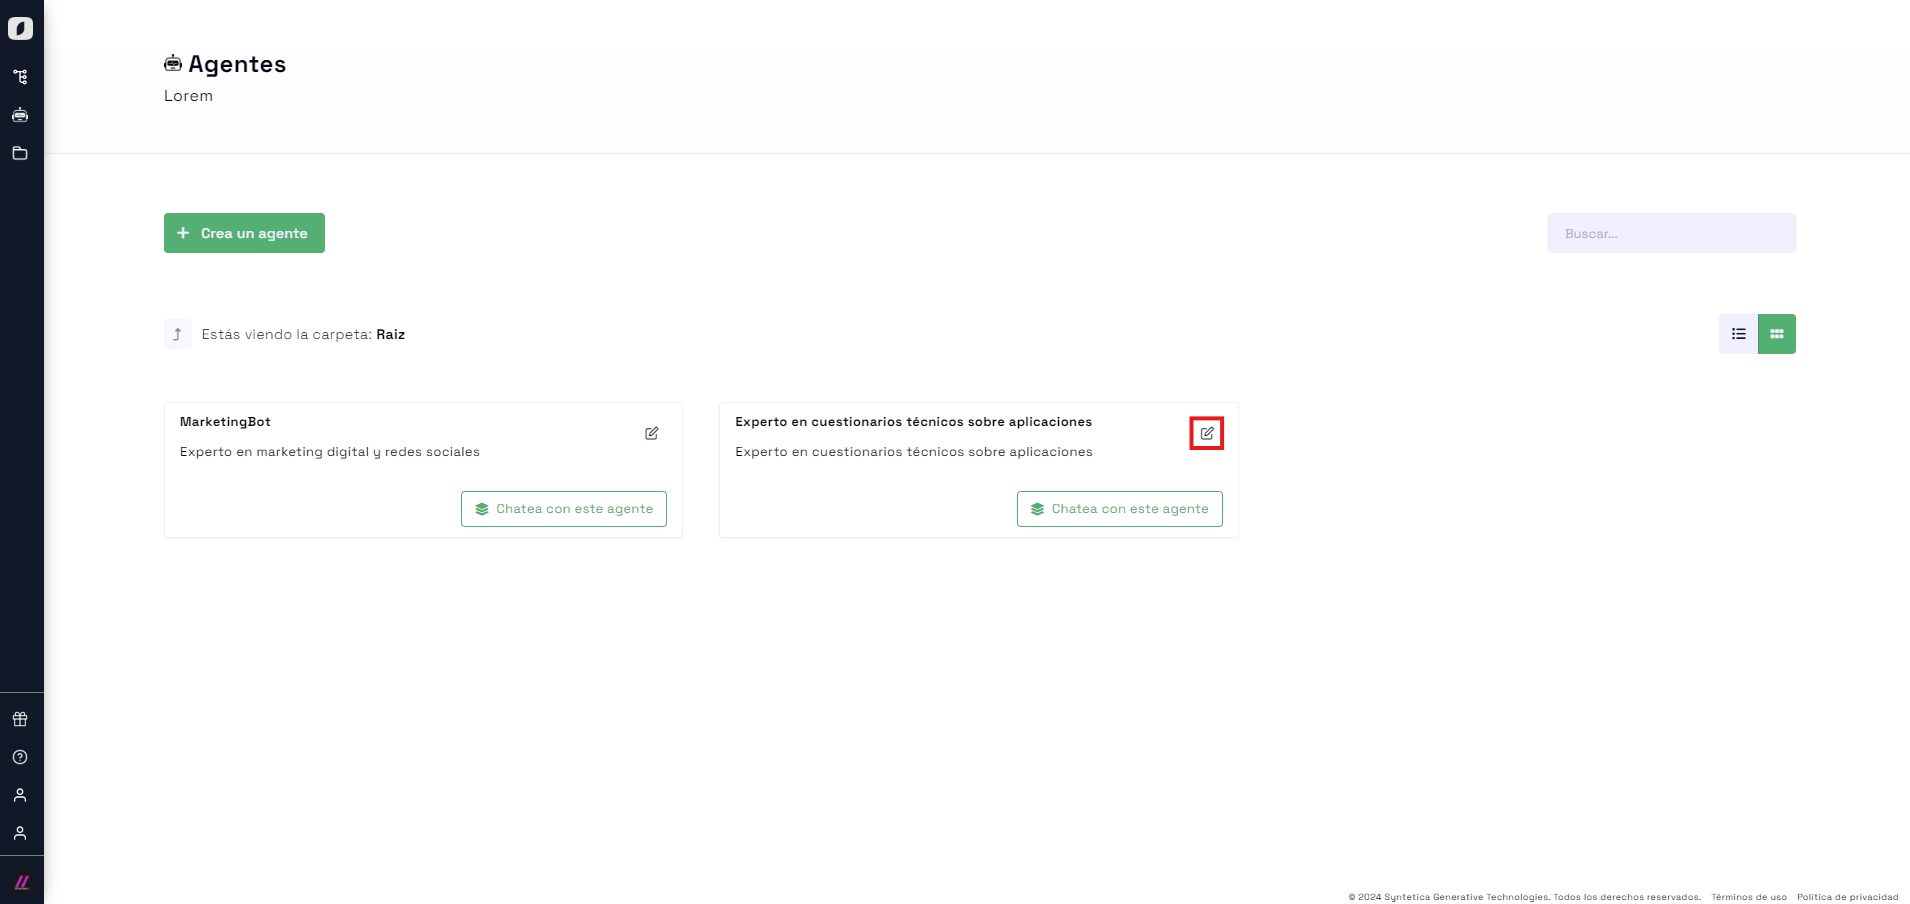 General view of agent management, showing the list of agents and editing options.
Then, click on "Edit Properties", which will open a pop-up with editable fields.
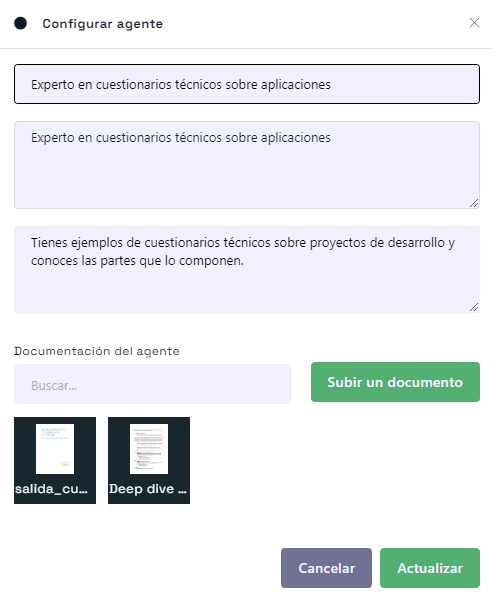 Pop-up for editing agent properties
In this pop-up, you can change any details of the agent, such as its name, description, or associated files. Make sure to carefully review the information before clicking "Update" to save the changes. This functionality is useful for keeping your agents' information updated and relevant.
How to Delete an Agent
Deleting an agent is an irreversible action, so you should proceed with caution. To delete an agent, hover over the agent card you want to delete. You will see a trash can icon in the upper right corner of the card.
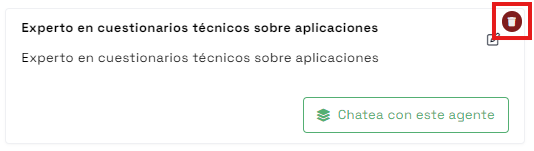 Trash can icon to delete an agent.
Clicking this icon will bring up a confirmation pop-up asking you to confirm the deletion. Click "Confirm" to proceed. Once confirmed, the agent will be permanently removed from the list. This option is useful when you no longer need a specific agent and want to keep your list of agents organized.
Note: Make sure you really want to delete the agent before confirming, as this action cannot be undone.
How to Chat with an Agent
Interacting with agents through chat is one of the most practical features of the platform. To chat with an agent, first select the agent you want to interact with and click on "Chat with this Agent".
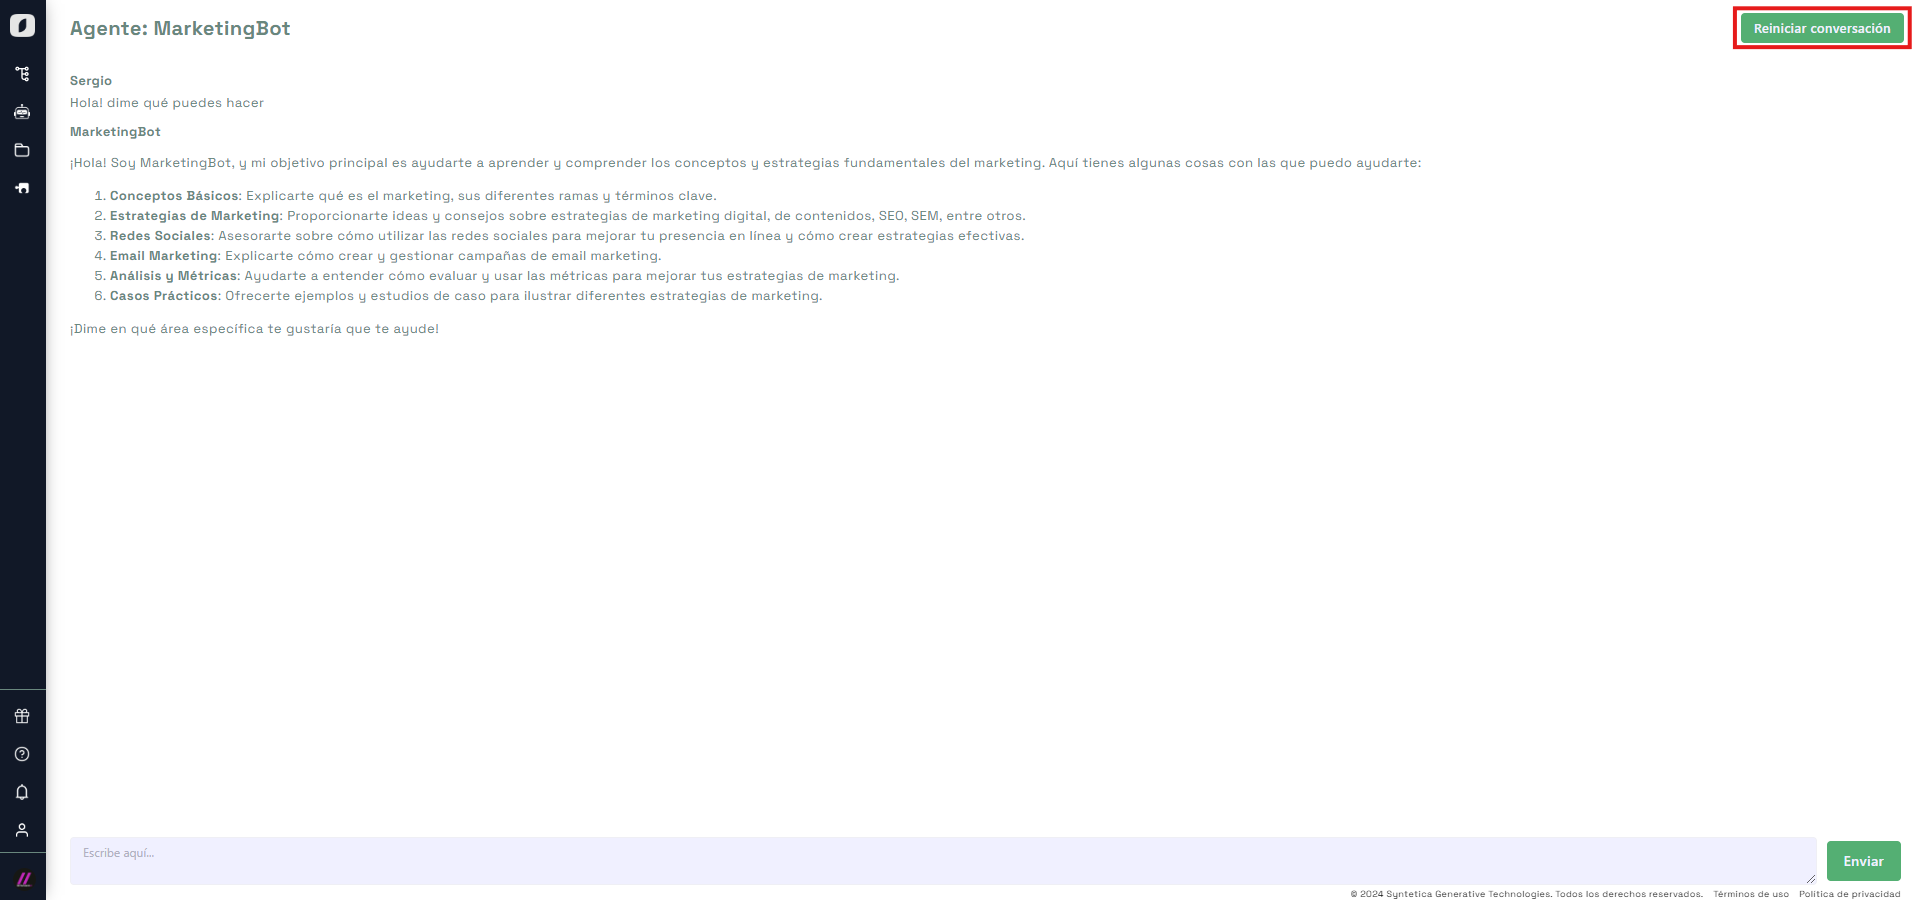 Chat interface with an agent, showing options to send messages and restart the conversation.
A chat window will open where you can write messages and receive real-time responses from the agent. This functionality is ideal for quickly and accurately obtaining information from your agents. If at any point you want to restart the conversation, simply click on "Restart Conversation", located in the upper right corner of the chat window.
Note: Using the chat efficiently can significantly improve your experience on the platform, allowing you to resolve doubts and obtain assistance quickly.
In summary, managing agents on our platform is an intuitive and straightforward process that allows you to add, update, delete, and chat with agents efficiently. By following these steps, you will be able to keep your agents organized and optimized for your specific needs.