Ready-to-use AI Apps
Easily manage evaluation processes and produce documents in different formats.
Account Management and Billing
In this article, you’ll learn how to manage your account details and billing information on the platform. This guide will help you update your billing data, change your subscription type, purchase additional tokens, and view or download your invoices and transactions.
Update Billing Details
To keep your account current, it’s essential to have up-to-date billing information. This ensures you receive accurate invoices and avoid payment issues.
To update your billing details, first access the settings section from the navigation menu.
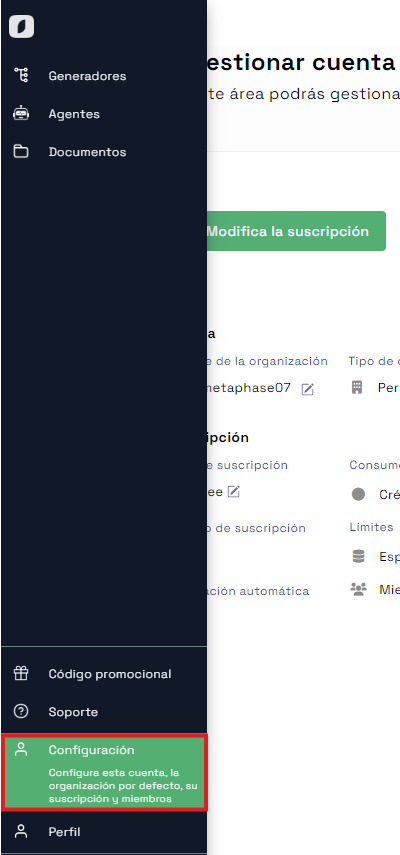 Navigation menu with the settings option highlighted
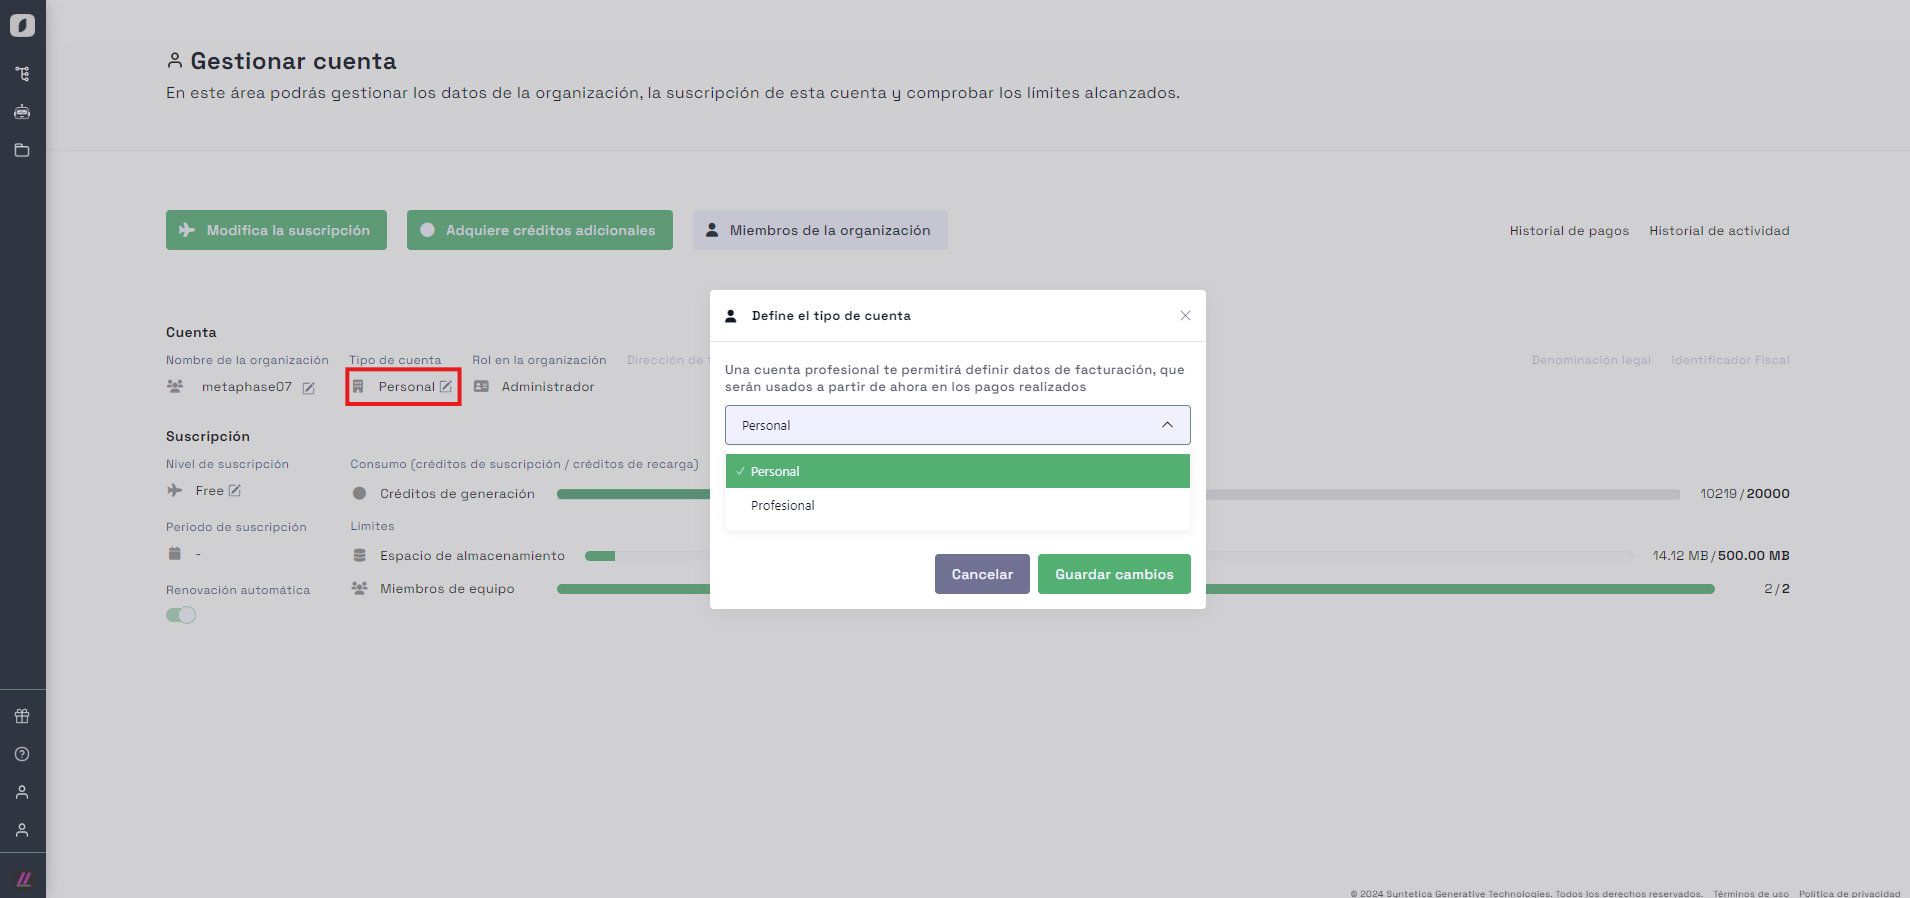
Once inside, if your account is personal, you won’t need to enter billing details. However, if it’s a professional account, you’ll need to complete the billing information to save it properly. Click "Edit billing details" to modify your billing information.
 Form to edit billing details
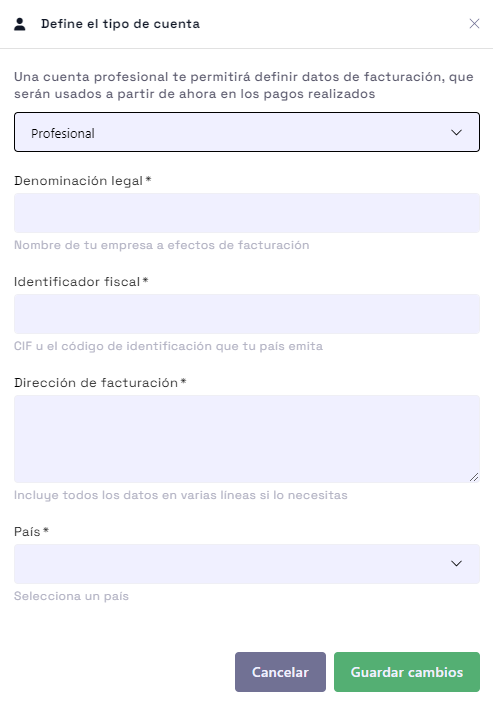
You’ll see a form to update your billing information. Make sure to fill in all required fields and save the changes when done.
 Form to update billing details
Change Subscription Type
Changing your subscription type is a simple process that can be done from the account management section. This lets you adjust your plan to match your current needs.
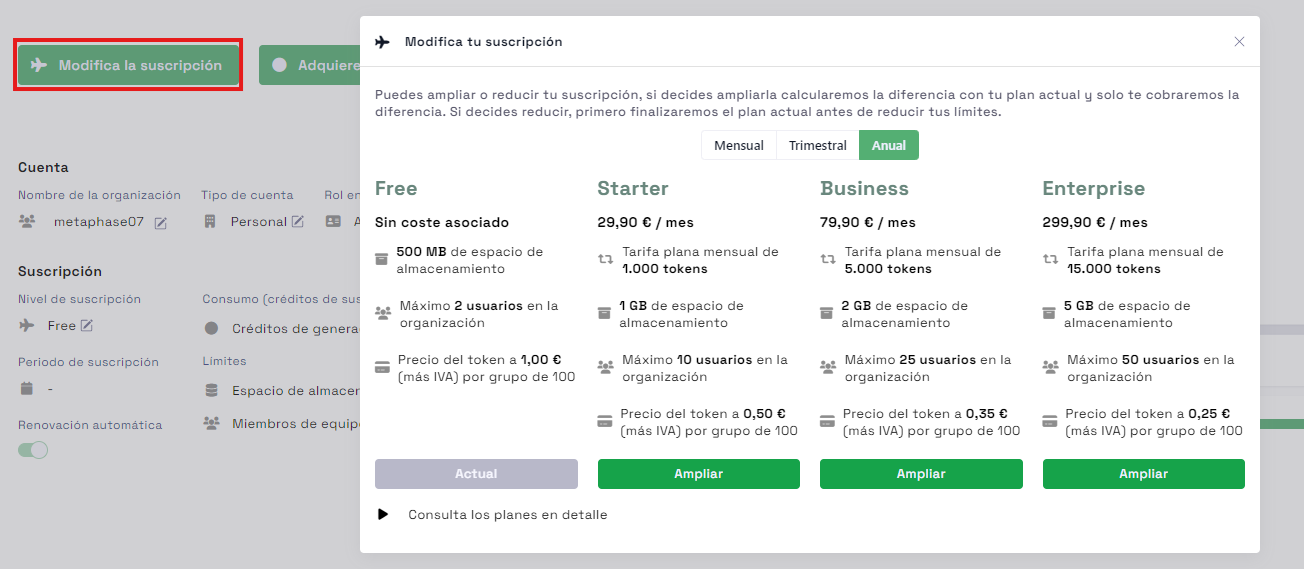
To update your subscription type, click the "Modify Subscription" button. A window will appear with detailed information about the available plans.
 Form for selecting subscription type
After updating your subscription type, an invoice summary will appear on the right side of the page. From there, you can download the receipt or request the invoice.
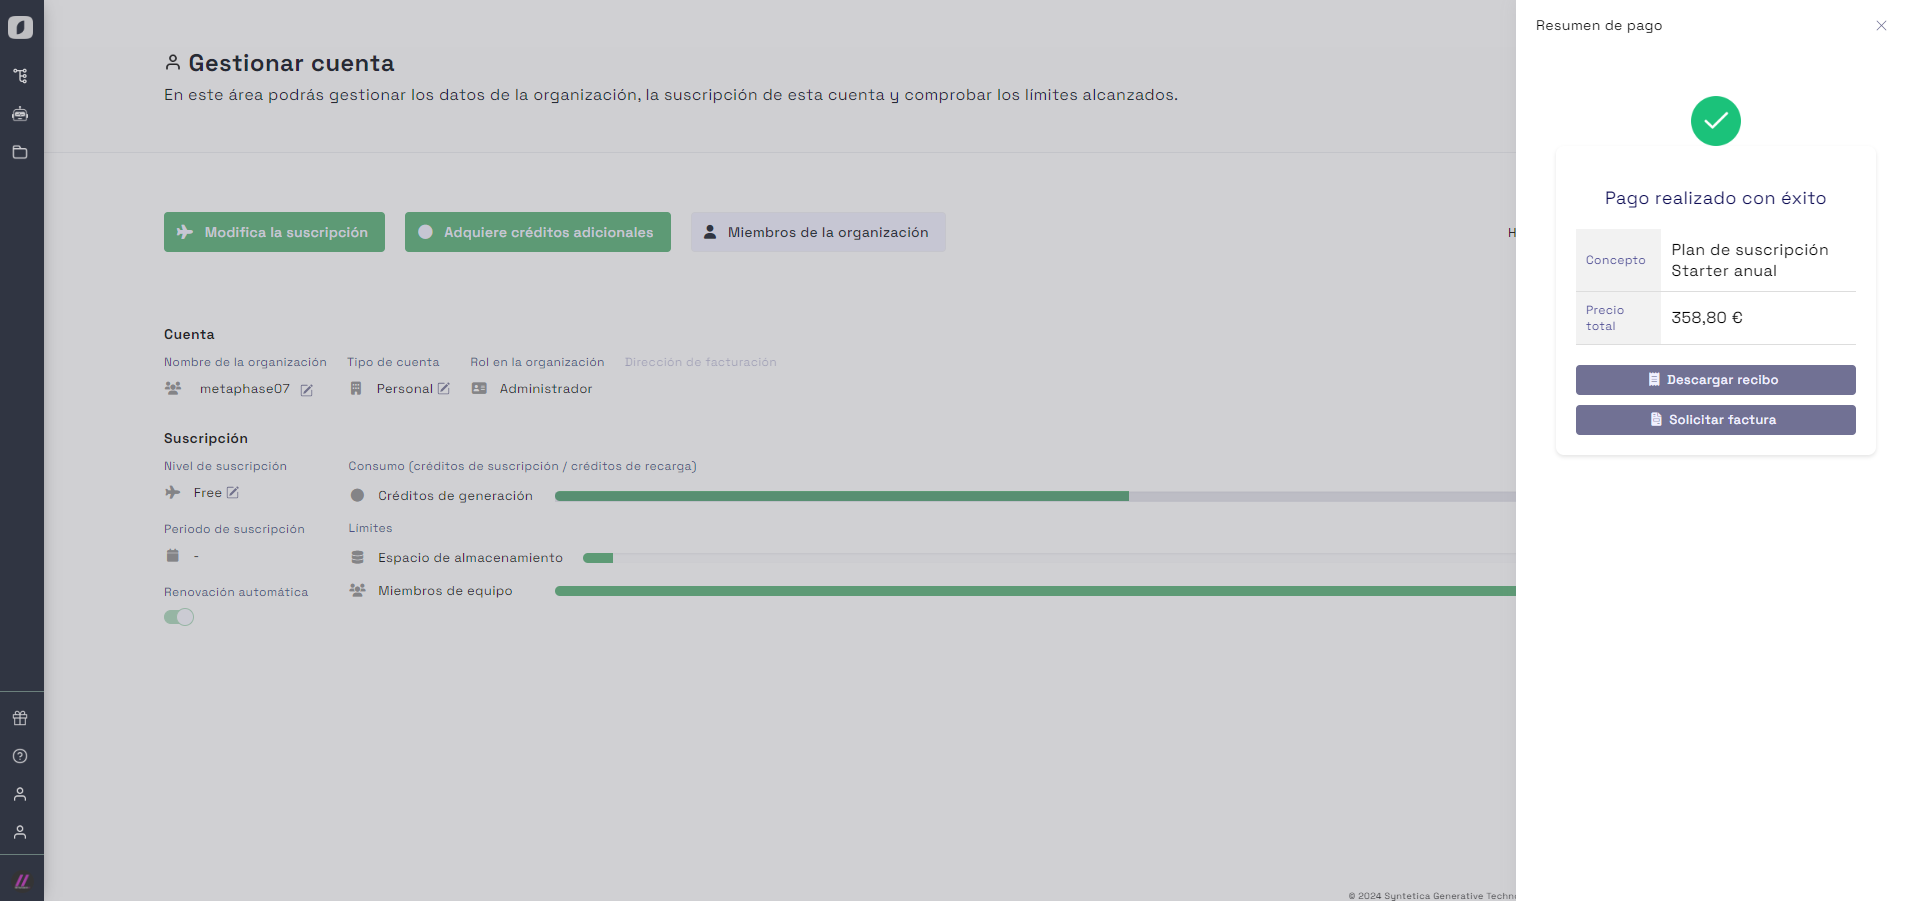 Detailed invoice view on the platform
Click one of the buttons to view either the receipt or the invoice, depending on your selection.
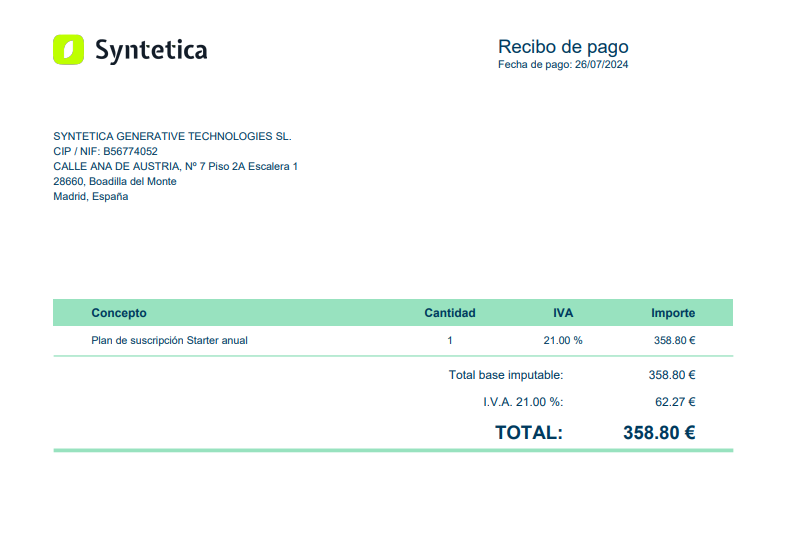 Example of an invoice downloaded from the platform
Purchase Additional Tokens
If you need more tokens to use platform features, you can easily purchase additional tokens. This allows you to quickly add credit to your account.
To begin, click the "Buy Additional Tokens" button and follow the detailed steps. Use the slider to select the number of tokens you want to purchase. The amount to be paid will appear below.
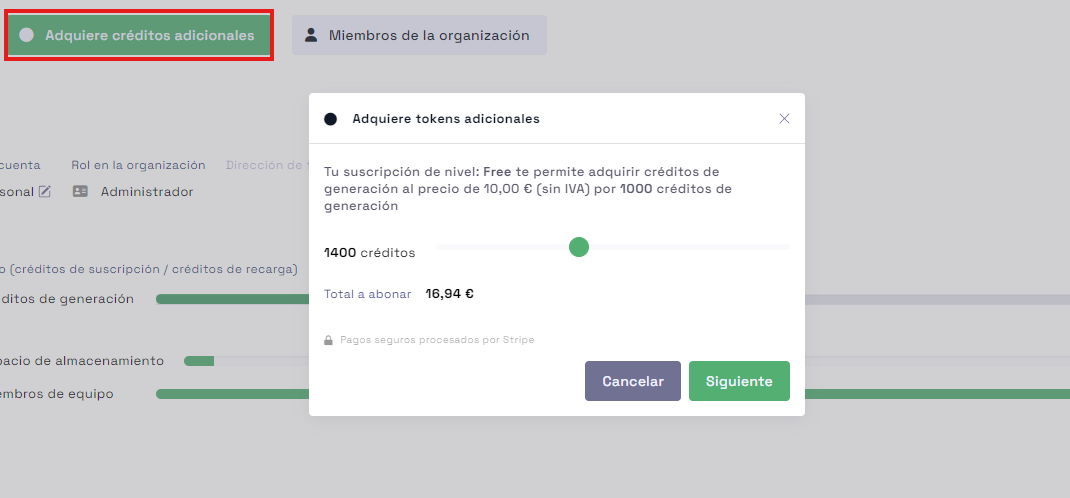 Interface for topping up by selecting the number of tokens
After selecting the amount, click "Proceed to Payment." A new pop-up will appear where you can enter your credit card details.
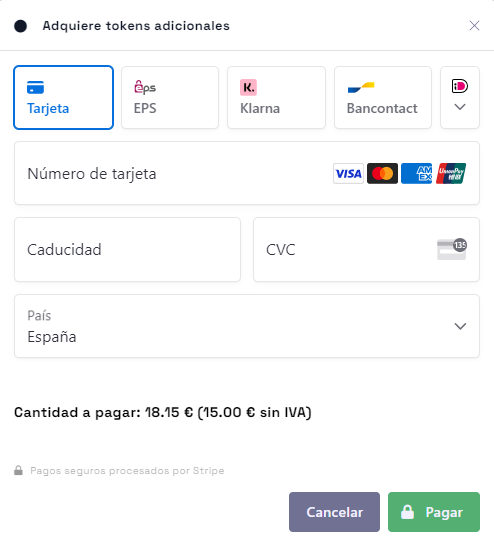 Form to enter credit card details
Click "Pay" to complete the purchase, and the tokens will be added to your account automatically.
View transactions and download invoices
Keeping track of your payments and transactions is essential for good financial management. The platform makes it easy to view and download all your invoices and transaction history.
To access this information, click the three-dot menu and select "Activity/Payments" to view your activity and payment history, where you’ll see all your transaction records.
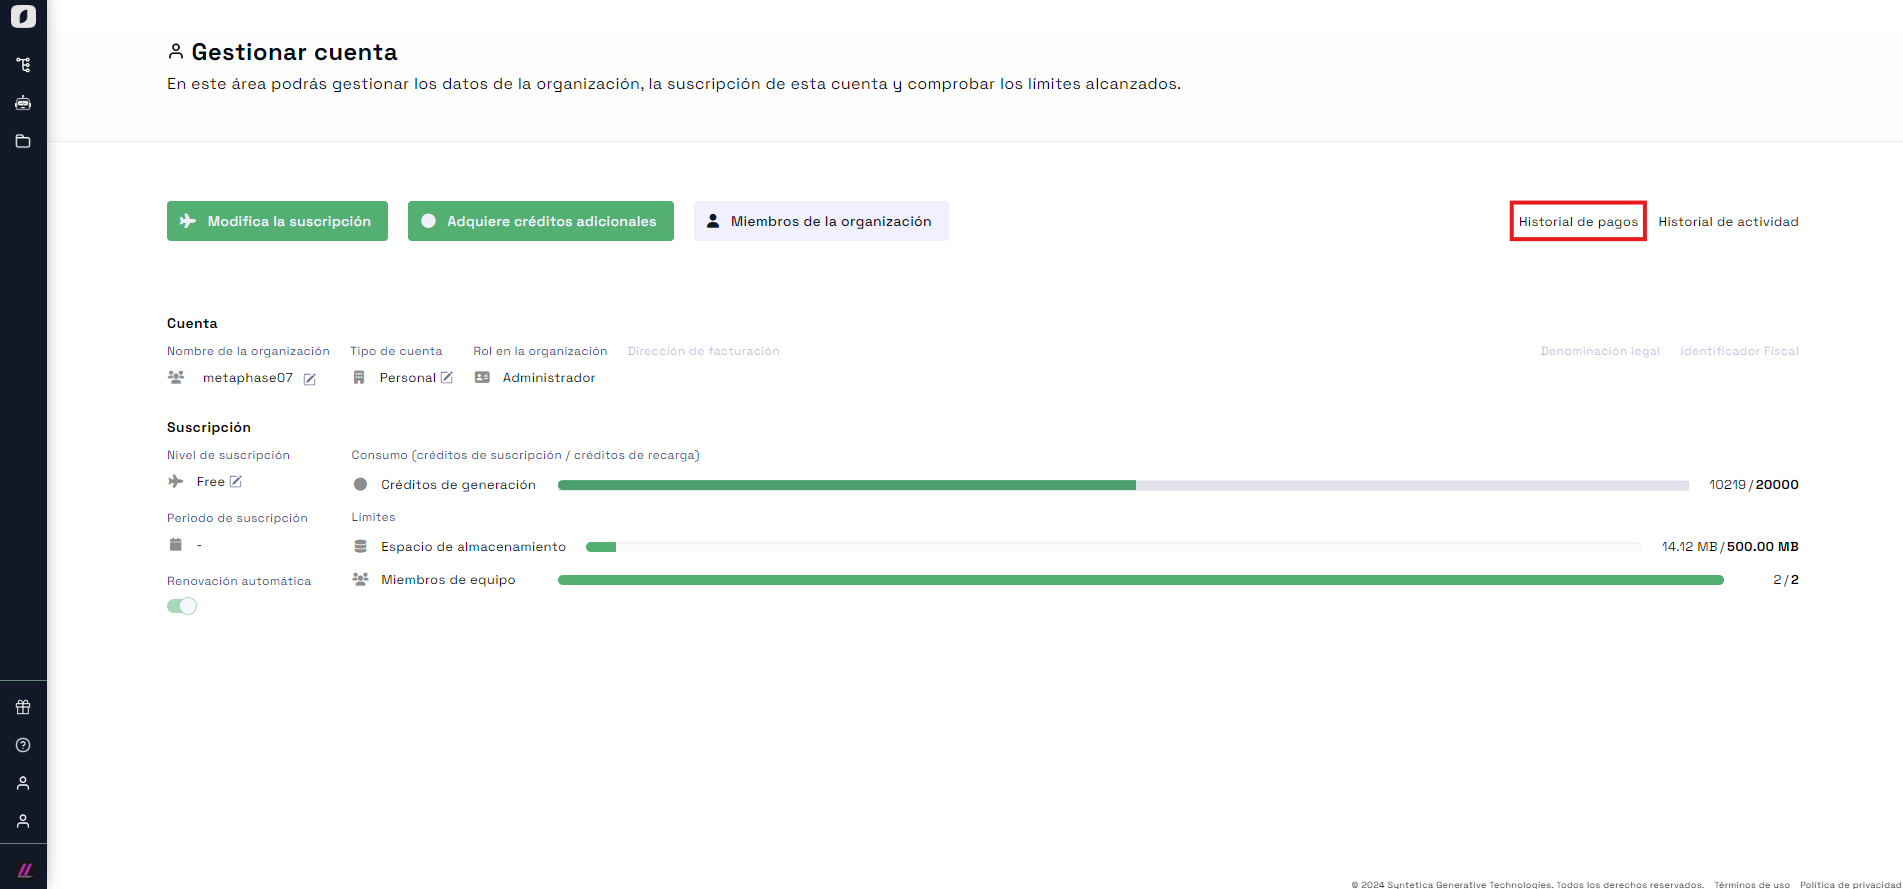 Button to access activity and payment history
Each transaction will be detailed, showing the date, amount, and description. You’ll also have the option to download the corresponding invoice.
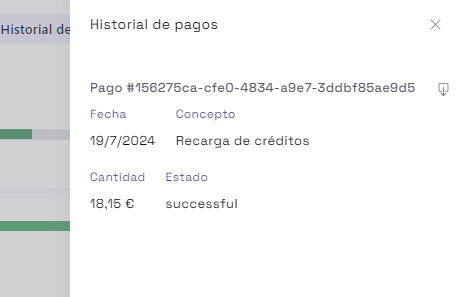 List of invoices available for download
To download an invoice, click the three-dot menu next to the desired invoice and select "Download Receipt."
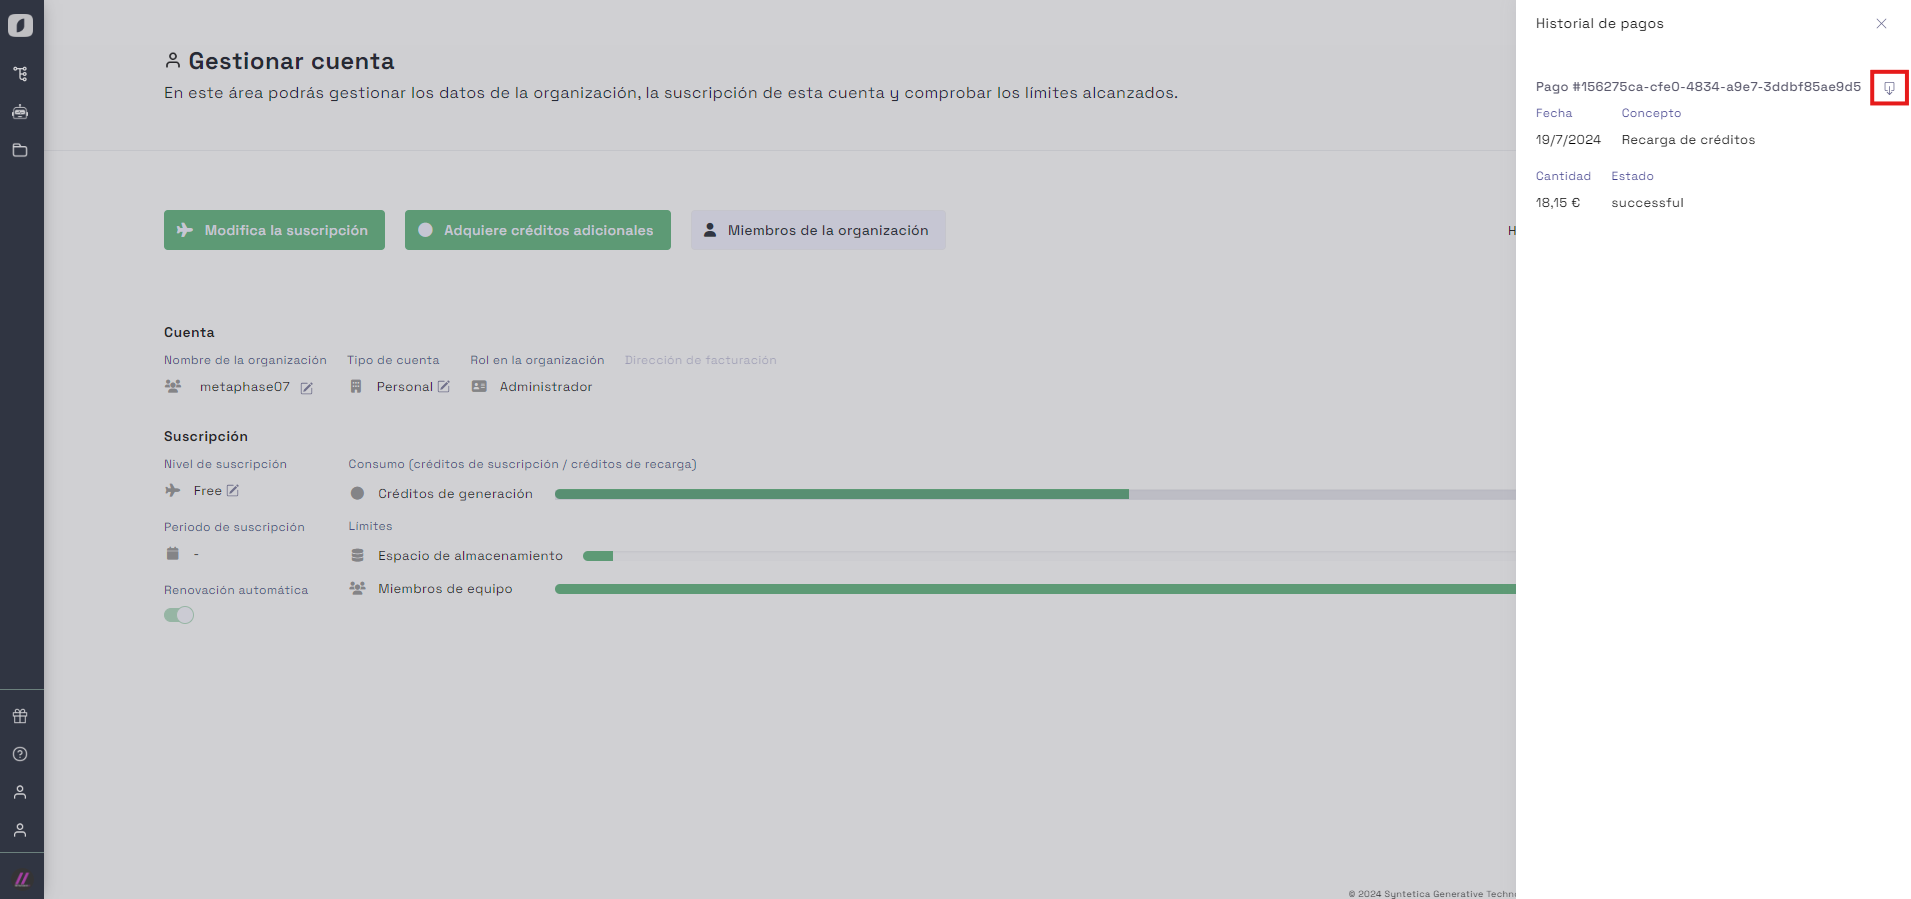 Download icon to obtain the selected invoice
Keeping your billing information updated and maintaining a detailed record of your payments is key to avoiding issues and making the most of the platform.
By following these steps, you’ll be able to efficiently manage your account and keep accurate control of your billing and payment details.
Users, Groups, and Invitations
Managing users and groups within your organization is essential for a well-organized and efficient workspace. The platform provides intuitive tools to manage user groups, send invitations, and handle team member permissions.
User Groups
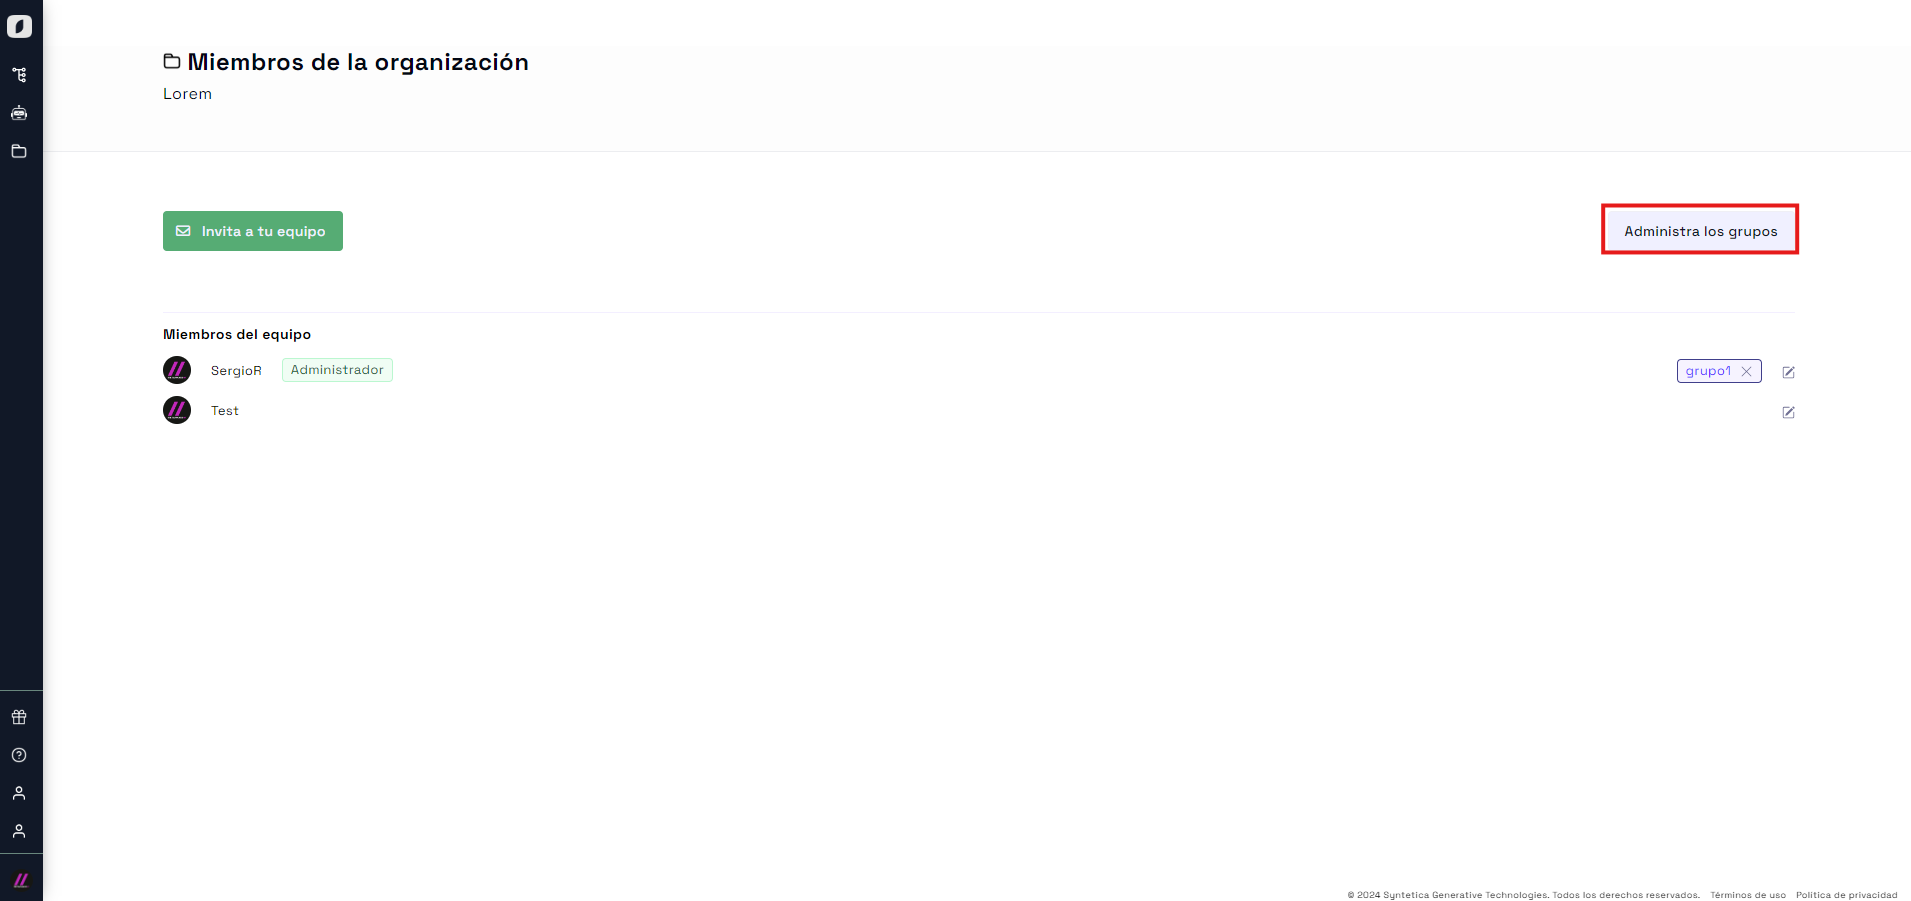
To access the user groups view, click the three-dot menu and select "Team Members." Here you can view all existing groups within your organization.
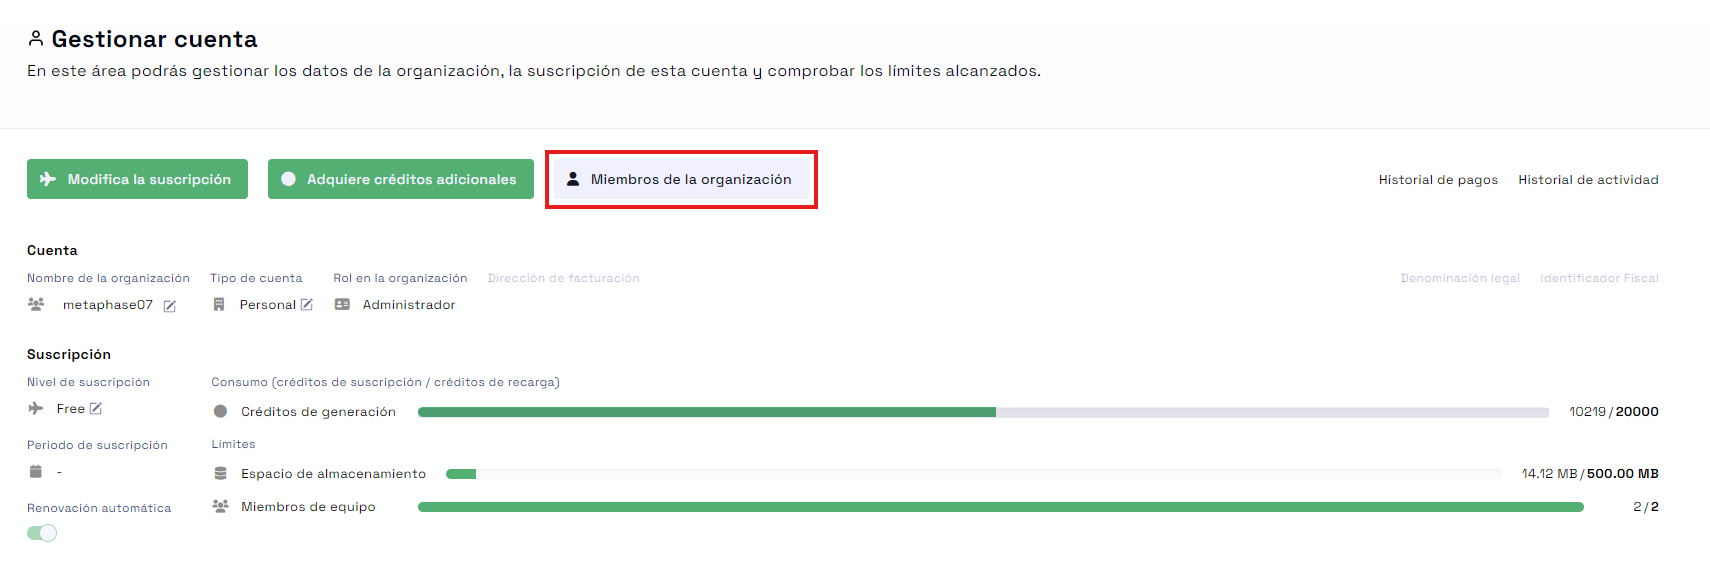 Access to organization members and group management
From this view, you can edit a group’s name or delete it if it's no longer needed. You can also add a new group or close the dialog when you're done.
 View of the organization members section
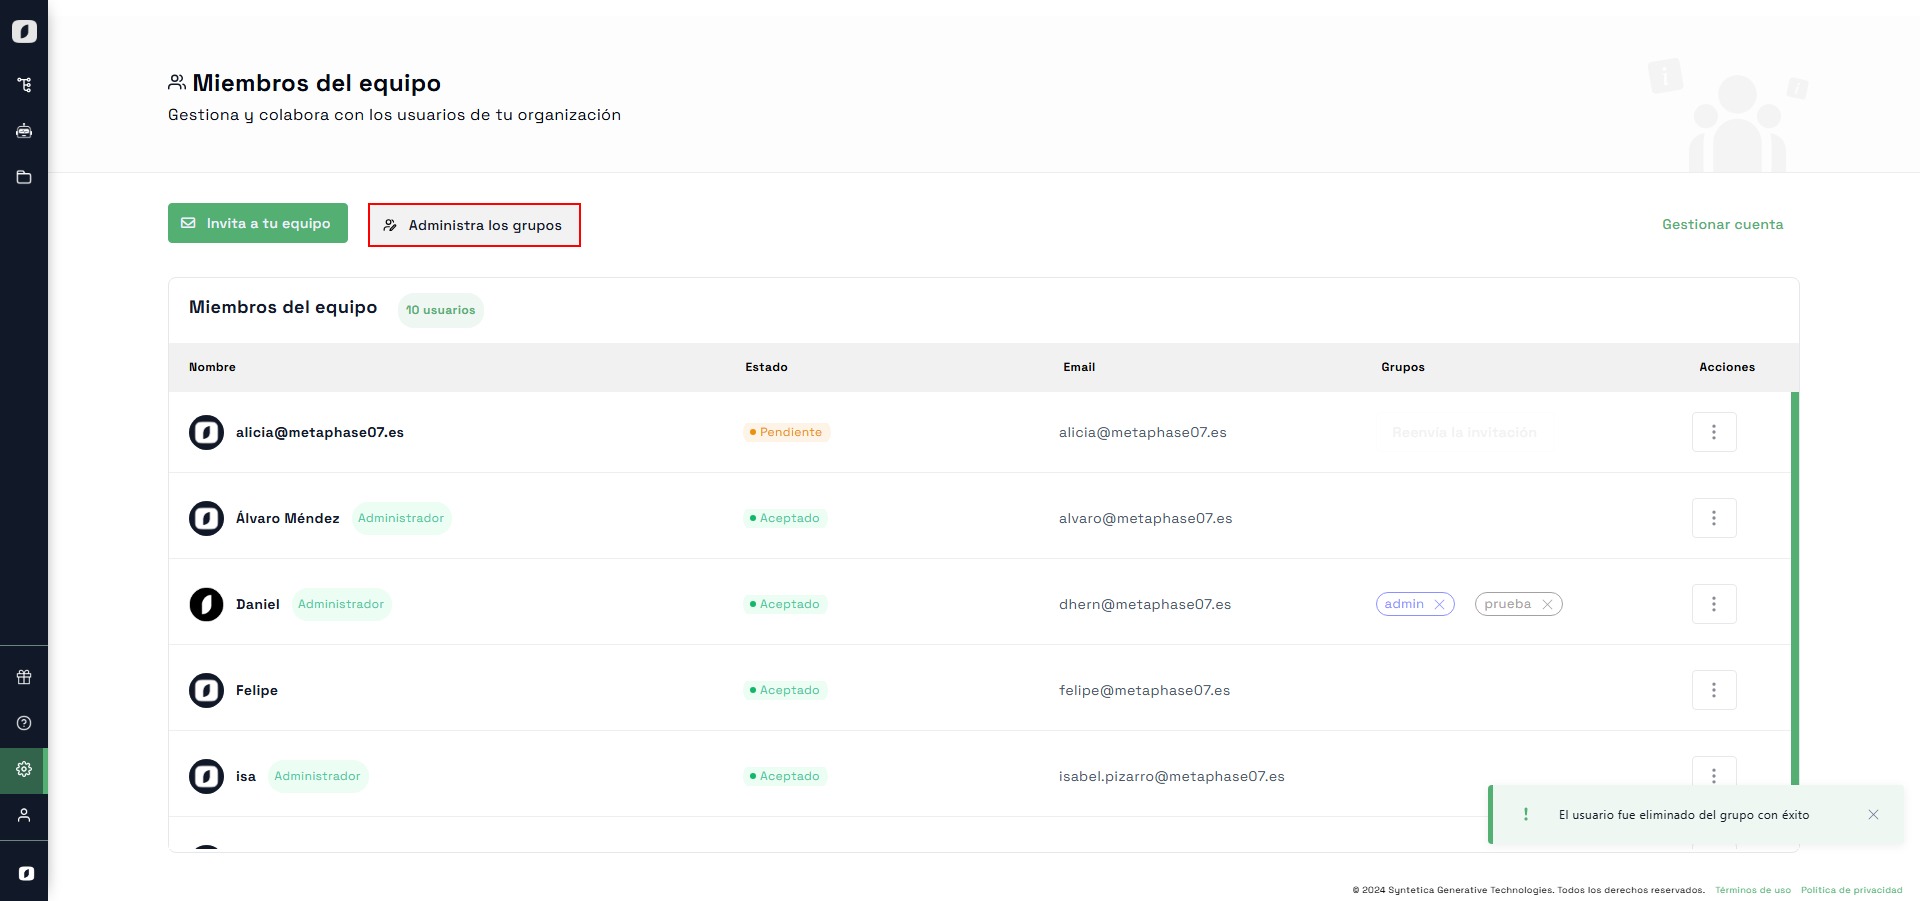 View of user groups on the platform
Invite Your Team
To invite new members to your team, click the "Invite Your Team" button in the "Organization Members" view. A form will open where you can enter the email addresses of the people you want to invite to the platform.
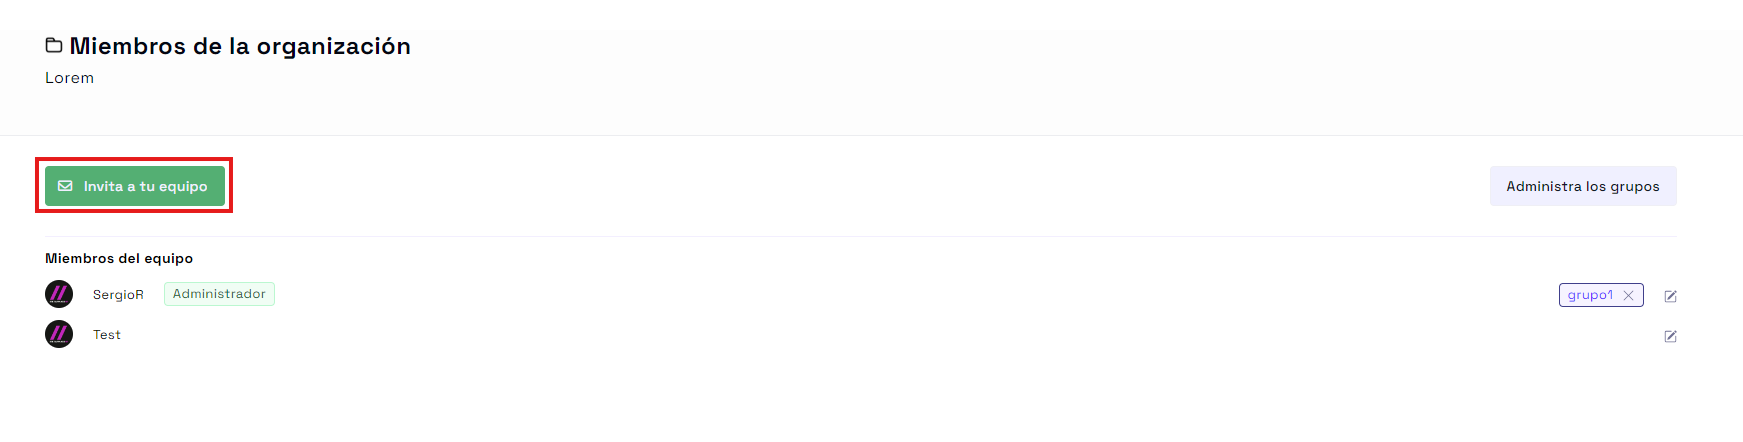 Form to invite new team members
Team Member List
In the team members section, you’ll see a list of all users in your organization. From here, you have several options to manage each member:
- Assign to a group: Add the user to a group.
- Make admin: Grant admin permissions to a user.
- Remove from organization: Remove a user from the organization.
 List of team members with management options
Maintaining a clear and well-structured user and group organization is essential for your team’s efficiency. Use these tools to ensure that all team members have the correct permissions and are properly organized.
By following these steps, you’ll be able to effectively manage users and groups within your organization, ensuring a collaborative and well-structured work environment.